Recent Posts

Showing posts with label Holidays and Celebrations. Show all posts

Thursday, November 29, 2012

A Moroccan Themed "Sip n' See"

This past weekend I had the honour of working with one of my best friends to help throw her sister a "Sip n' See". A "Sip n' See" is pretty much a baby shower that happens after the baby is born so the guests actually get to see the baby while they "sip" and in this case "eat" as well.

I worked with Mandy's sister, Seri of Little Miss Party Planner back in May to help put together Mandy's bridal shower so it was nice to have the roles reversed this time.

Mandy collabarated with our friend Ashley of Ashley Lindzon Events to put together all the fine details and I was left in charge of the food. I had free reign which I LOVE, all I had to do was keep the food a Moroccan theme.

Here is what I put together for the savoury food table:
  • Morocccan Antipasto Bar: assorted breads and flat bread, roasted eggplant dip, spicy feta dip, chickpea spread, baked za'ataar goat's cheese, marniated roasted red pepper salad, citrus and spiced olives and mini falafel balls
  • Moroccan Cigars: crispy pastry filled with spiced ground beef served with a tahina dipping sauce
  • Spiced Tomato Soup Sips: shooters of warm tomato soup spiced with ginger, garlic, cumin and smoked paprika topped with a flat bread triangle
  • Chickpea Salad: spiced chickpeas tossed with fresh tomatoes, cucumber, onion and cilantro topped with a mint-yogurt drizzle and served in white wonton spoons
  • Moroccan Chicken Skewers: grilled Moroccan spiced chicken served with harissa aioli for dipping


 I kept dessert pretty simple:
  • Mini Cupcakes: mini vanilla bean cupcakes topped with an orange blossom and vanilla bean frosting garnished with candied orange peel
  • Floral Bundt Cake: a gorgeous rose shaped bundt cake studded with preserved lemons, orange and lemon zest and topped with a tangerine glaze and icing sugar sprinkle
  • Chai Creme Brulee: small portions of Chai scented creme brulee served in mini white ramekins


For beverages Mandy and Ashley put together a fabulous display of options including a Do-It Yourself Caesar bar which was a huge hit. I whipped up some Moroccan mint iced-tea which I sweetened with the leftover orange sugar from the cupcakes which added a wonderful flavour to the already delicious tea.


The event was a great success and I can't wait to work with all of these lovely ladies again soon, but maybe next time not when I am 8 and half months preggo :)

One last thing, a big shout out to the amazing photographer Robyn Harrison who took all of the amazing pictures seen on here. 

Monday, May 7, 2012

Tea for Two

I am so sorry for the lack of posting recently but I am back!

This past weekend I helped put together a "Tea for Two" themed bridal shower for my friend Mandy.

The Bride's sister and Maid of Honour, Seri, runs an INCREDIBLE party planning company based out of NYC, called Little Miss Party Planner, or LMP for short (www.littlemisspartyplanner.com)

Under the supervision of LMP, myself and the other bridesmaids put together an amazing event.

I wont go into details of all the decor and special touches as LMP will cover those on her blog, but I will talk about what I know and that is the food.

We wanted to keep the food simple, light and easy for people to eat, so here is the menu I put together:
  • Tea Sandwiches: Curried Chicken Salad, Smoked Salmon with Dill Creme Fraiche & Caviar and Asparagus with Lemon Cream Cheese
  • Trio of Crostini: Gorgonzola Cream with Fresh Figs & Red Wine Reduction, Goat Cheese with Truffle Honey & Toasted Walnuts and White Bean Puree with Garlic Confit
  • Green Bean Bundles with Herb Dip
  • Wild Mushroom Phyllo Purses
  • Goat Cheese and Caramelized Shallot Tarts topped with a Roasted Tomato
  • Bacon and Aged Cheddar Scones with Chive Butter
  • Crab Cakes with Dijon Aioli
The beautiful desserts were supplied by the amazing Bobette and Belle (www.bobbetteandbelle.com) but I threw in one dessert of my own, and with the help of my friend Jayme (and Pinterest of course) created some adorable tea bag sugar cookies.


See below for pictures of the event. All photos were taken by the wonderful Robyn Harrison. (www.robynharrison.com)


The event was a great success and I can't wait to celebrate with everyone at the wedding.

Congratulations Mandy! Only 125 days to go! xoxo

Thursday, April 12, 2012

Salami and Onion Matzoh Brei Frittata

Here is one more Passover recipe to get you through the rest of the week.

Salami and Onion Matzoh Brei Frittata
Serves 4
  • 6 pieces of unsalted matzoh 
  • 6 large eggs
  • 1 sweet onion, chopped
  • 2 cups Kosher beef salami, cut into small cubes
  • 2 Tbsp.vegetable oil
  • kosher salt and pepper
  1.  Preheat your ovens broiler.
  2. Into a colander, break the matzoh into small pieces, about 1-inch in size. Rinse the matzoh under hot tap water until the pieces are softened, about 1-2 minutes. Let stand for 5 minutes.
  3. In a large mixing bowl whisk the eggs and season with salt and pepper. Stir in the matzoh pieces until coated well with the egg.
  4. Heat a large saute pan over medium-high heat. Add the oil and saute the onions until softened and slightly golden, add the salami and continue to cook until the salami starts to crisp. Turn the heat to high and add in the matzoh and egg mixture. Stir to combine, then using the spatula, flatten the mixture.
  5. Place the pan into the oven and bake under the broiler until the top is golden and the eggs have cooked through, about 8-10 minutes.
  6. Sprinkle with some salt pepper, and some fresh chopped parsley and serve.
  7. ENJOY!
 

Wednesday, April 11, 2012

Passover Recipe: Passover Fried Chicken

It is now mid Passover week and I don't know about you but by now my mother's delicious brisket leftovers are not so delicious anymore. It is time for something different, so why not go southern?

I based this recipe off of Thomas Keller's famous Ad Hoc Buttermilk Fried Chicken recipe and although obviously not as good as the real thing this kosher for passover recipe is top notch.

Although you have to start the prep for this dish the night before, brining the chicken before hand ensures juicy and flavourful chicken and makes a huge difference. Enjoy this chicken fresh from frying, reheated in the oven or even cold.

Passover Fried Chicken
Serves 6 (2 pieces of chicken each)
  • 6 bone-in, skin-on chicken thighs
  • 6 chicken legs
  • 8 cups of water
  • 1/2 cup kosher salt
  • 1/4 cup honey
  • 6 bay leaves
  • 1 head of garlic, cut in half  horizontally
  •  1 Tbsp. black peppercorns
  • a few thyme sprigs
  • a handful of fresh parsley
  • juice and zest from 2 lemons
  • 6 eggs, whisked
  • 4 cups matzoh meal
  • 2 Tbsp. garlic powder
  • 1 Tbsp. paprika
  • a couple pinches of cayenne pepper
  • kosher salt and fresh ground pepper to taste
  • vegetable or canola oil for frying 
  • honey for drizzling
  1. In a large pot combine the water, salt, honey, bay leaves, garlic, peppercorns, thyme, parsley, and lemon zest and juice. Place on the stove over high heat and bring to a boil. Cook for one minute until all the salt is dissolved. Remove from the heat and let cool.
  2. Once the brine is cooled add the chicken pieces. Place in the fridge over night or up to 12 hours.
  3. When ready, remove the chicken from the brine and pat dry. Let come to room temperature.
  4. Place the eggs into a shallow dish. Combine the matzoh meal, garlic powder, paprika, cayenne and salt and pepper.
  5. Once the chicken is at room temperature you are ready to bread. Working with one piece at a time, place the chicken into the matzo meal mixture, followed by the egg mixture and then back into the matzoh meal. Place onto a baking sheet and repeat with the remaining chicken.
  6. Fill a large, saucepan with vegetable or canola oil and place over high heat. Once the oil is heated (if using a thermometer the oil should be about 325 degrees F), start frying the chicken a few pieces at a time until brown and crispy and cooked through. Remove onto a paper towel lined baking sheet and repeat with the remaining chicken.
  7. Just before serving drizzle the chicken with a little bit of honey.
  8. Enjoy!

    Monday, April 9, 2012

    Passover Recipe: Dark Chocolate and Fleur de Sel Matzoh Crunch

    It is that time of year again when Jews all around the world are celebrating Passover and thinking of creative ways to dress up the limited food that we can eat. One of the most popular Passover snacks is Matzoh Crunch; plain boring matzoh topped with delicious toffee and other delicious sweets. This year I decided to fancy up my matzoh crunch with some good quality  dark chocolate and fleur de sel. The results were SCRUMPTIOUS.

    Whether  you are celebrating passover or not whip up a batch today and you will not be disappointed.

    Dark Chocolate and Fleur de Sel Matzoh Crunch
    •  6 pieces of unsalted matzoh
    • 1 1/2 cups butter (or margarine)
    • 1 1/2 cups brown sugar
    • 100g bar of good quality dark chocolate
    • a few pinches of fleur de sel or other flaky salt
    1.  Preheat the oven to 325 degrees F.
    2. Lay the matzoh onto a parchment lined baking sheet (you may have to use more than one) and set aside. You can break some of the pieces of matzoh in half to fit more onto a tray
    3. In a small saucepan, over medium heat, melt the butter or margarine with the brown sugar until melted. Raise the heat to medium high and bring to a boil. Cook, stirring occasionally until starting to thicken, about 2-3 minutes.
    4. Pour the sugar mixture over the pieces of matzoh and spread using a spatula until all the pieces of matzoh are fully covered. Place in the oven and bake for 10-12 minutes, until golden.
    5. While the matzoh is baking, melt the chocolate over a double boiler or in the microwave in 30 second intervals, being very careful not to let it burn.
    6. Remove the matzoh from the oven and let cool for 2 minutes then lightly sprinkle with the fleur de sel. Allow to cool for another few minutes and then generously drizzle the chocolate over.
    7. Allow the chocolate to harden at room temperature for about 30 minutes and then break the matzoh into small pieces. 
    8. ENJOY!

      Wednesday, March 28, 2012

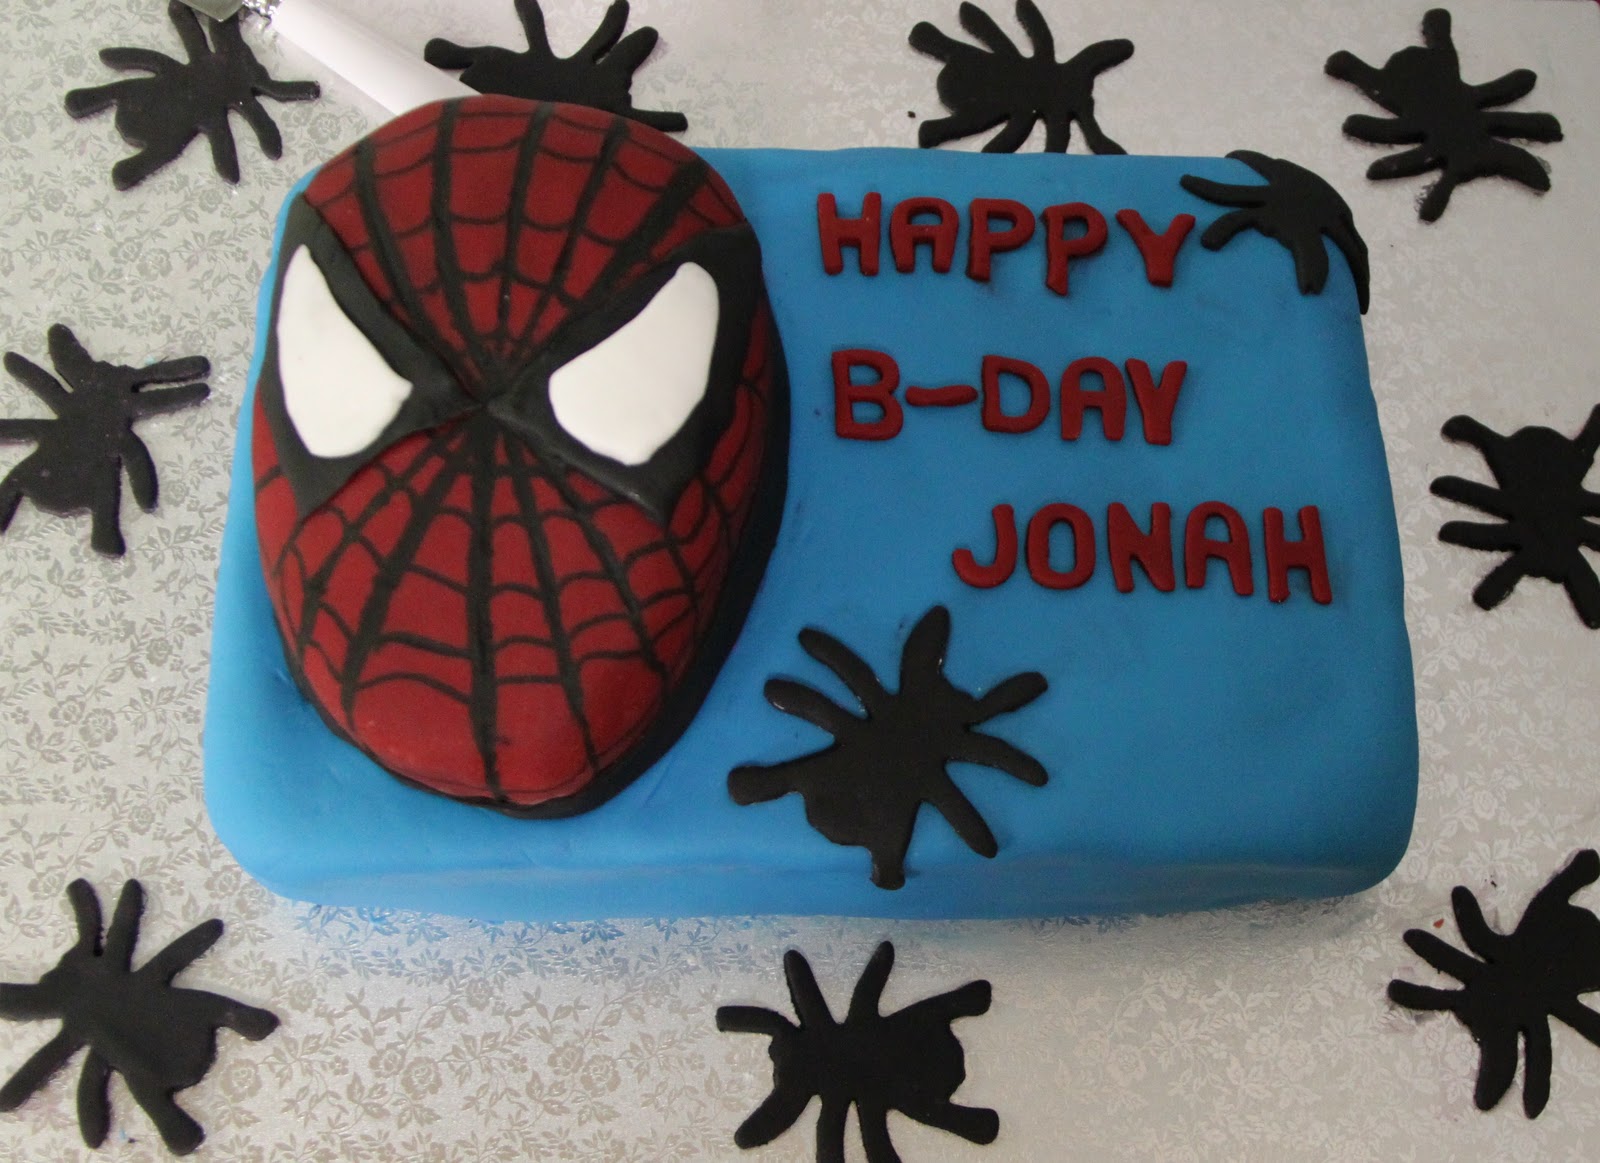
      Happy "Super" Birthday!

      Just wanted to share a picture of a cake made over the weekend for my nephews 5th birthday!!!

      Happy birthday Jonah! I love you!

      Wednesday, February 15, 2012

      Product Review: Valentine's Day Whoopie Pies

      I hope everyone had a wonderful Valentine's Day yesterday full of love, chocolate and candy!

      I spent the evening working a Couple's Cooking class but wanted to leave Jordan a little Valentine's Day treat for when he got home. Since I didn't have much time in the morning before I had to head to work I turned to the help of a boxed mix.

      I decided whoopie pies were the way to go and so I went with this mix:
      Click here for info.
      I added my own twist on the mix by using a piping bag to make the whoopie pies into a heart shape and then using food dye to make the icing a lovely hot pink. Overall I was very satisfied with this product. The baking time was a little off, but I think that is because I piped the hearts larger than the size directed on the box. Jordan was satisfied with the mix too, which I was able to tell by the crumbs left on the plate when I got home This was definitley a great boxed mix perfect for whipping up a quick and delicious sweet treat!


      Wednesday, January 4, 2012

      Happy New Year!

      Happy New Year! I wish everyone a year full of health, happiness and of course delicious food :)

      To start off 2012 I wanted to share some pics of the New Year's Eve dinner party Jordan and I hosted.

      I hope everyone else had a delicious new year's eve!


      Tuesday, November 29, 2011

      Monkeying Around

      Check out these cupcakes I made for my nephews 1st birthday this past weekend!

      I got the idea from here but altered it a little bit. I used half of a vanilla wafer for each of the ears instead of a whole one and instead of piping on the face and eyes with icing I used a black food marker.

      How cute are they? (sorry it is not the best pic, I took it with my phone)

      Saturday, November 26, 2011

      Weeknight Thanksgiving Feast!

      I may be Canadian but this past week every time I turned on the television someone was talking about or making Thanksgiving dinner. The thoughts of turkey and stuffing were filling my head so the other night I caved and made a full out thanksgiving dinner just for Jordan and I!!! You must think I am crazy but it was actually a lot easier than you think. I obviously didn't go and make a 30 lb. turkey but instead bought just a turkey breast. I used some stale hamburger buns to make the stuffing, made a quick pan gravy, microwaved some frozen peas and mashed up some taters and in just over an hour Jordan and I were eating like we were American!!!!

      Butter Basted Turkey Breast
      Serves 2
      • 1 boneless, skin-on turkey breast
      • 1/4 cup butter, softened
      • 1 Tbsp. parsley, chopped
      • 1 clove of garlic, minced
      • salt and pepper to taste
      1. Preheat the oven to 400 degrees F. 
      2. Place the turkey breast on a cooling rack placed on top of a baking sheet.
      3. In a small bowl combine the butter with the parsley, garlic, salt and pepper.
      4. Using your hands spread the butter all over the turkey breast, including under the skin.
      5. Place the turkey in the oven and roast until cooked through (internal temperature should be 165 degrees C), about 30-40 minutes. 
      6. Remove from oven and let rest before slicing.


        Skillet Stuffing
        Serves 2-4
        •  1 Tbsp. vegetable or olive oil
        • 1/2 Spanish onion, chopped
        • 2 ribs of celery, chopped
        • 1 clove of garlic, chopped
        • 2 tsp. mixed herbs, chopped (you can use whatever you have on hand, parsley, thyme, rosemary)
        • salt and pepper to taste
        • 4 cups stale bread, cubed
        • 1 cup chicken stock (or more if necessary)
        1. Once the turkey is in the oven, start preparing the stuffing.
        2. Heat a skillet over medium-high heat. Once hot add the oil and the onions. Saute until softened and starting to brown then add the celery and garlic, continue to cook until celery is starting to soften, about 5 minutes then stir in the bread cubes.
        3. Stir in the herbs and season with salt and pepper. 
        4. Pour over the stock until the bread is just wet, stirring to combine. Place the skillet in the oven and let bake along with the turkey. Remove when the turkey is done, the stuffing should be nice and crispy on the outside but still soft on the inside.


        Quick Pan Gravy
        • 1 Tbsp. butter
        • 1 Tbsp. flour
        • 2-3 cups chicken stock
        • 1 tsp. Worcestershire sauce
        • drippings from turkey
        • salt and pepper to taste
        1. Heat a small saucepan over medium heat. Add the butter and let melt. Once melted stir in the flour to form a roux (a paste).
        2. Cook the roux while stirring for one minute then whisk in 2 cups of the stock. Bring to a boil and let thicken then stir in the Worcestershire sauce. Take off the heat until the turkey is done cooking.
        3. Once the turkey is done and resting, place the gravy over low heat and stir in the turkey drippings. Adjust the consistency with some more stock if necessary then season with salt and pepper to taste.
        4. Serve with the rest of your meal.


          Monday, October 17, 2011

          Sesame Street Cake Pops

          One of my nephews turned two a few weeks ago. He loves Elmo (or "Melmo" as he calls him) so I decided to make him some Elmo cake pops to celebrate.

          I followed the basic instructions from the amazing Bakerella's post here but slightly changed things up a bit.

          For the eyes instead of the white candy that she used I found candy googly eyes from Wilton at Bulk Barn, you can also purchase them here.

          For the nose Bakerella used a whole orange jelly bean. I found it easier to cut the jelly bean in half lengthwise creating a flat and sticky surface to stick the nose on with. If you are going to make these at home make sure to buy smaller jelly beans (like Jelly Belly).

          For the fur, Bakerella used a method of using a toothpick to paint the fur on using the candy melts. I found it a little less time consuming to use red sprinkles for the fur. I used the same method and order as Bakerella but when she painted I sprinkled the pops with the sprinkles.

          A few days after my nephews birthday I got a call from a friend of my sister-in-law's who asked me if I could make some Elmo cake pops for birthday party she was throwing for her daughters. As well as Elmo she wanted some Cookie Monster pops as well. The method for Cookie Monster was the same, but he didn't have a nose and I used half of a mini chocolate chip cookie instead of the mouth.

          Here is how everything turned out:

          Wednesday, June 29, 2011

          I Scream, You Scream.....

          My sister-in-law just graduated from school as a Doctor of Chiropractic. To celebrate the occasion my in-laws threw a fabulous party. Most of the party was catered but my mother-in-law asked me to help out with the dessert table.

          Inspired by a post by Amy Atlas (here), we decided to put together an ice cream sundae bar. We got various ice cream flavours, and stored them in large ice buckets and then filled a table with various glass vessels full of toppings that included: chocolate sauce, sprinkles, cookies, candies and much, much more!

          In addition to the ice cream I wanted to make another little treat. Inspired by my previous post (here) and Bakerella's post (here) I decided to make Ice Cream Cone Cake Pops. They were SUPER cute!

          Check them out:


          The party was so much fun and the dessert was a HUGE hit! Congrats Deb!!!

          Tuesday, April 19, 2011

          Passover Recipe: Roasted Sweet Potato Salad

          Last night marked the official start of Passover so I spent yesterday in the kitchen helping my mother with the cooking for the first Seder. My mom is pretty much a Seder pro at this point and has got the chicken soup and brisket down to an art so she left me in charge of the side dishes.

          This dish was new this year, but will definitley become part of our regular Seder repertoire. It is served at room temperature which makes leftovers perfect to take to work for lunch instead of the typical matzah and cheese which ends up being crumbs by the time lunch hour rolls around.

          Roasted Sweet Potato Salad
          Serves 12 as a side dish
          • 4 lbs. sweet potatoes, peeled and cut into cubes
          • 1 Tbsp. plus 1/4 cup olive oil
          • 2 Tbsp. maple syrup
          • juice of one orange
          • juice of one lemon
          • 1/2 tsp. cinnamon 
          • pinch of nutmeg
          • 1 cup Italian flat leaf parsley, roughly chopped
          • 3 green onions, white and green, thinly slice
          • 1 cup pecans, toasted and roughly chopped
          • 1 cup golden raisins
          • salt and pepper
          1. Pre-heat the oven to 400 degrees F.
          2. In a large mixing bowl, toss the sweet potato with 1 tbsp. of the olive oil and salt and pepper. Place onto a baking sheet and roast until golden and tender, tossing halfway through, about 30 minutes.
          3. Meanwhile, whisk together remaining olive oil, maple syrup, orange juice, lemon juice, cinnamon and nutmeg. Season with salt and pepper and set aside.
          4. Remove potatoes from oven and slightly cool.
          5. While still warm, toss potatoes with parsley, onions, pecans and raisins. Pour the dressing on top and set aside.
          6. Serve warm or at room temperature.

          Sunday, March 27, 2011

          Spider-man Cake!

          My nephew Jonah turned 4 this weekend! This year he requested a Spider-Man cake.

          Here are a few pictures I took during the making of the cake and the end result:


          HAPPY BIRTHDAY JONAH! I LOVE YOU!!!
          Related Posts Plugin for WordPress, Blogger...